Page section
Inhoudsopgave
With a regular page section, you have all the freedom to fill it with rows and elements yourself.
Go through the following steps to add a new page section:
- Log into the CMS and go to the website editor.
- Go to the page where you want to add the page section.
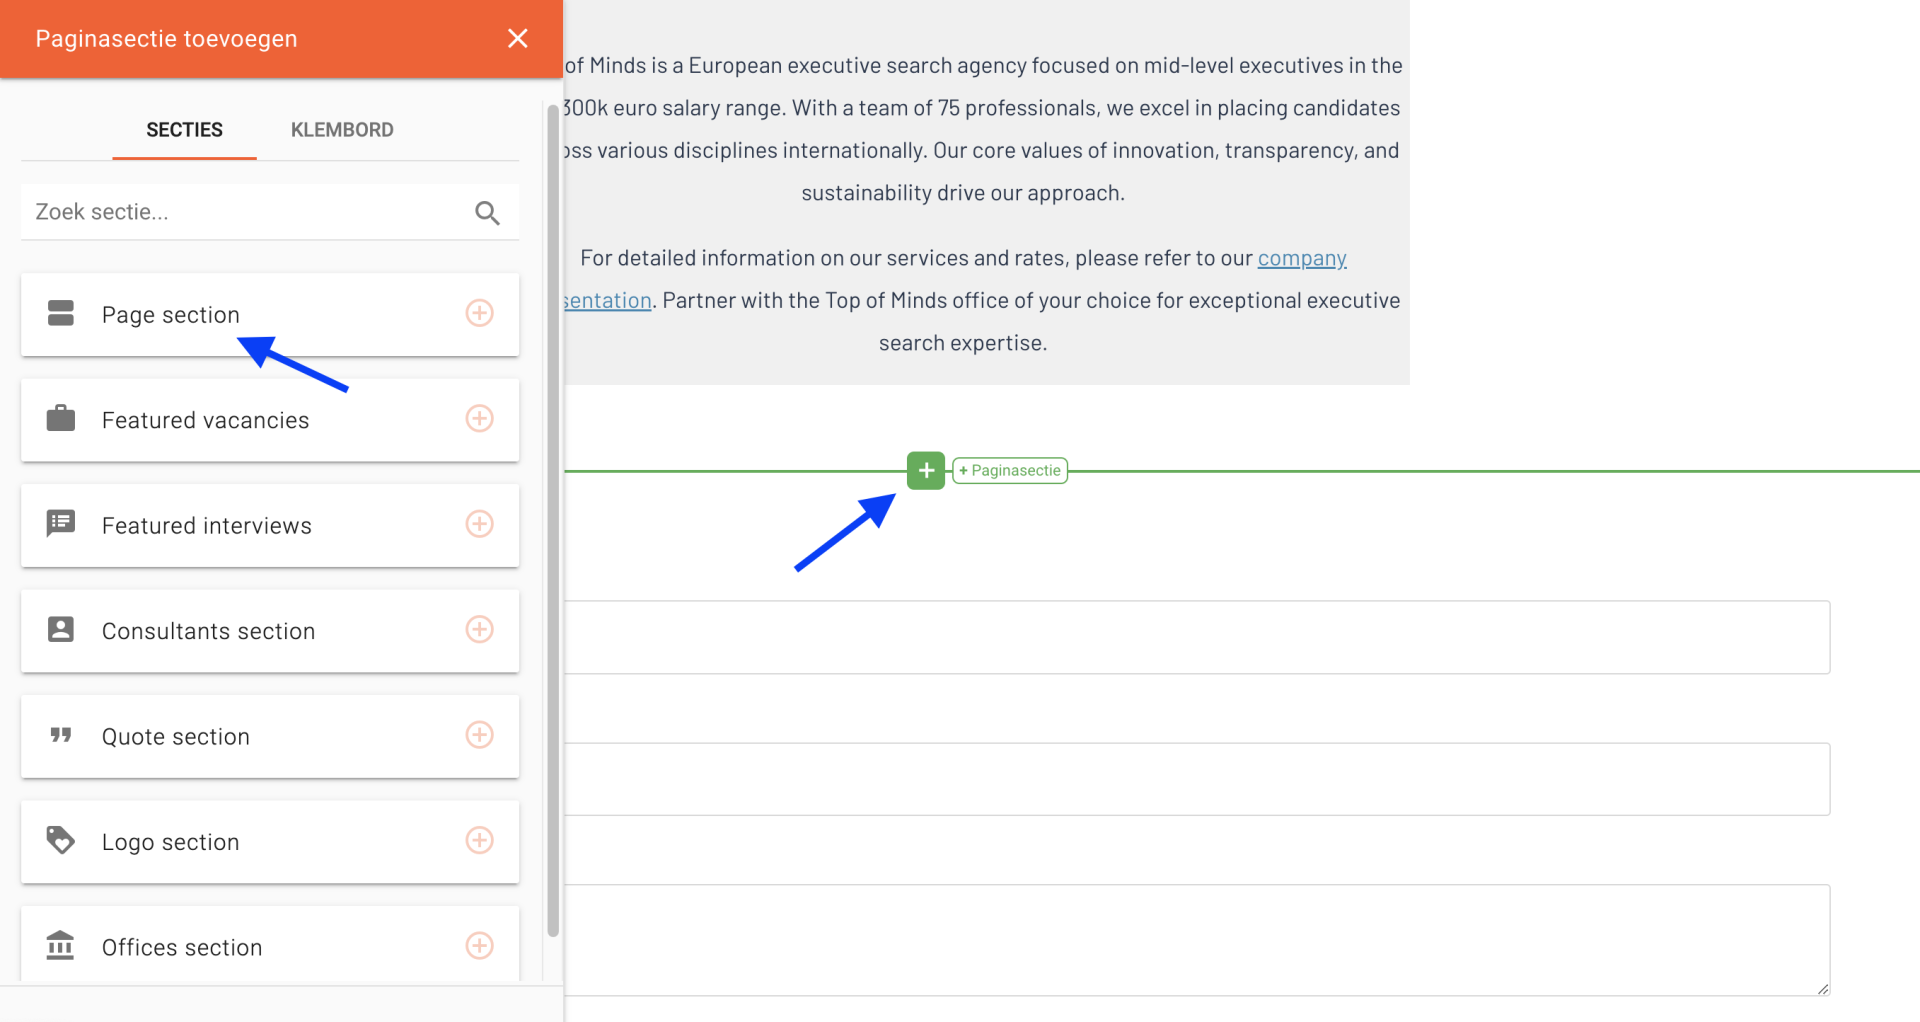
- Hover your mouse over the screen where you want to add the section so that a green block becomes visible in the middle of the screen. Move your mouse over this so that the text + Page Section appears. If you click on this the editor window will appear, here you can choose which section you want to add, choose Page Section in the overview or search for 'Page Section'.

Three tabs appear in the editor window:
- Settings: A name for the section should be entered here, it is not displayed in the website itself. The name is used in the editor to indicate the order of sections under post settings, or you can select a section name to create an internal link with. Furthermore, you also specify the width of the section: normal or narrow.
- Styling: Here you specify how much space you want above and below the section. This can be a fixed space, or you can enter your own value. The width can be different for desktop and mobile, so you'll find the same settings here twice; for mobile and for desktop.
- Colors: These settings allow you to change the background color of the section and the text color. You can choose from the colors from the design (these are set in 'Site settings') or you can choose your own color.
- First row: Here you can choose the number of columns that will be added in the first row. In each column you will be able to add elements. For example, if you want to put three images next to each other you choose three columns here. The number of columns can always be changed, so it is also possible to choose this later.
