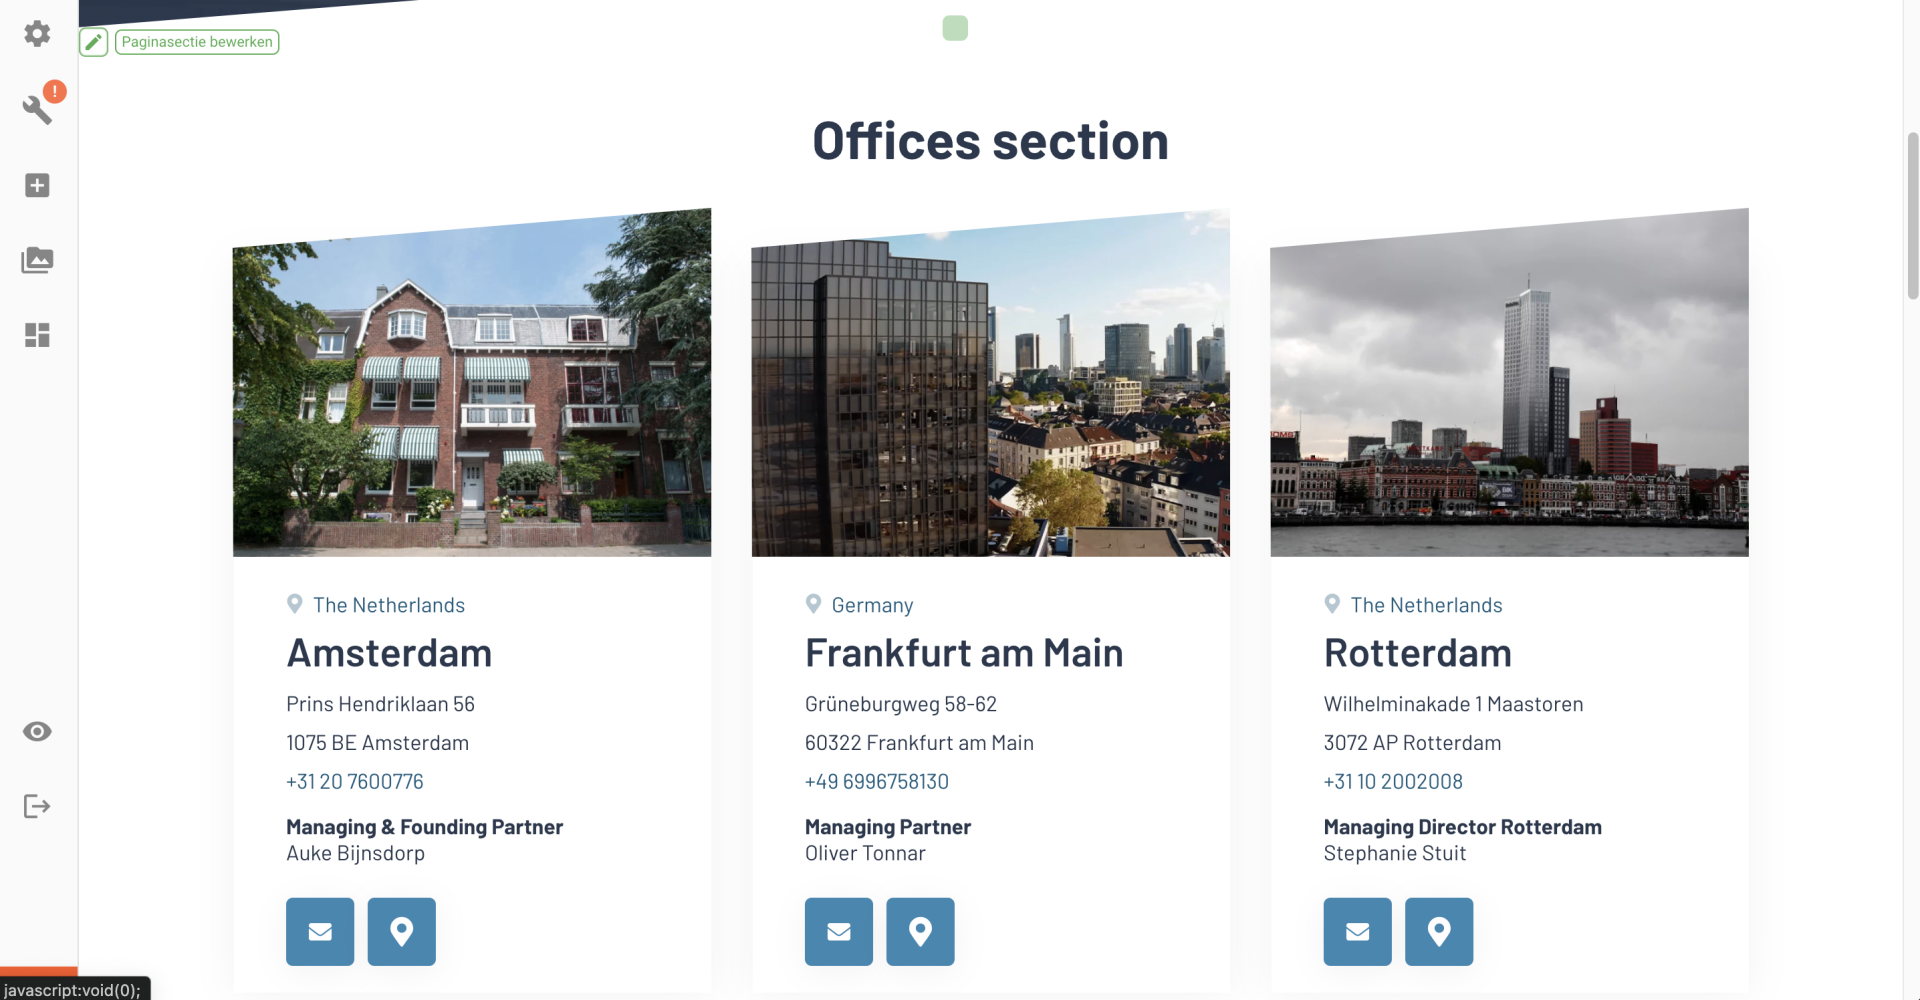
Offices section
Inhoudsopgave
This section allows you to display an overview of offices.
Go through the following steps to add a new section:
- Log into the CMS and go to the website editor.
- Go to the page where you want to add the office section.
- Hover your mouse over the screen where you want to add the section so that a green block becomes visible in the middle of the screen. Move your mouse over this so that the text + Page Section appears. If you click on this the editor window will appear, here you can choose which section you want to add, choose Office section in the overview or search for 'Office section'.

In this section you can determine which offices are shown:
- Click on the blue plus icon 'Offices' and select a specific office from the dropdown. Or add a new office bij clicking 'Of maak een nieuwe...' and filling all the fields that are shown.
- Then choose 'Apply' to add this office to the featured list.
- Repeat to add all the offices you would like to show in this section.
One tab will appear in the editor window:
- Settings: A name for the section should be entered here, it is not displayed in the website itself. The name is used in the editor to indicate the order of sections under post settings, or you can select a section name to create an internal link with.The title is visible on the page though, it is at the top of the office section. Then you can select different offices by clicking on the blue plus sign. You can choose from existing offices, but you can also add new ones.
